From CrewAI to KAgent: Deploying Your Custom AI Agents#
If you've been working with CrewAI and love how it lets you orchestrate multiple AI agents for complex tasks, you might be wondering how to take those agents from your local development environment to a production-ready deployment. That's where KAgent's Bring-Your-Own (BYO) agent feature comes in. With our latest support for CrewAI BYO agents, this process is now seamless and straightforward.
In this post, we'll walk through transforming your existing CrewAI crew into a KAgent BYO agent. We'll assume you already have a working CrewAI agent and focus on deployment steps. If you don't have a CrewAI agent yet, consider following one of their getting started guides or cloning one of the examples.
Why Deploy to KAgent?#
Before we dive into the how, let's talk about the why. KAgent provides several advantages over running CrewAI agents locally:
- Enterprise-grade deployment with Kubernetes
- Session-aware memory that persists across conversations
- Built-in tracing with OpenTelemetry
- A2A protocol compatibility for agent-to-agent communication
- Web dashboard for easy management and testing
- Production monitoring and scaling capabilities
Furthermore, your agent will be able to interact with other agents and MCP servers already deployed in your KAgent environment, enabling more complex workflows and integrations.
Prerequisites#
Make sure you have:
- A working CrewAI agent
- KAgent installed in your Kubernetes cluster (quick start guide)
- Docker for building container images
- kubectl for Kubernetes operations
- Tracing configured if desired, see the tracing guide
Step 0: Test Your Agent Locally#
Ensure that you have a CrewAI agent ready and tested locally, for example using crewai run, crewai flow kickoff. Check what input your agent requires since that will be needed to kickoff the agent from Kagent.
If you want to follow the example below but don't have a CrewAI agent, a simple one to start is the self_evaluation_loop_flow agent from the CrewAI examples repository.
This example shows a flow with 2 agents that generates X posts in Shakespearean style and then evaluates them to iteratively improve the quality. It doesn't require any tool API keys. Here's an diagram illustrating the flow:
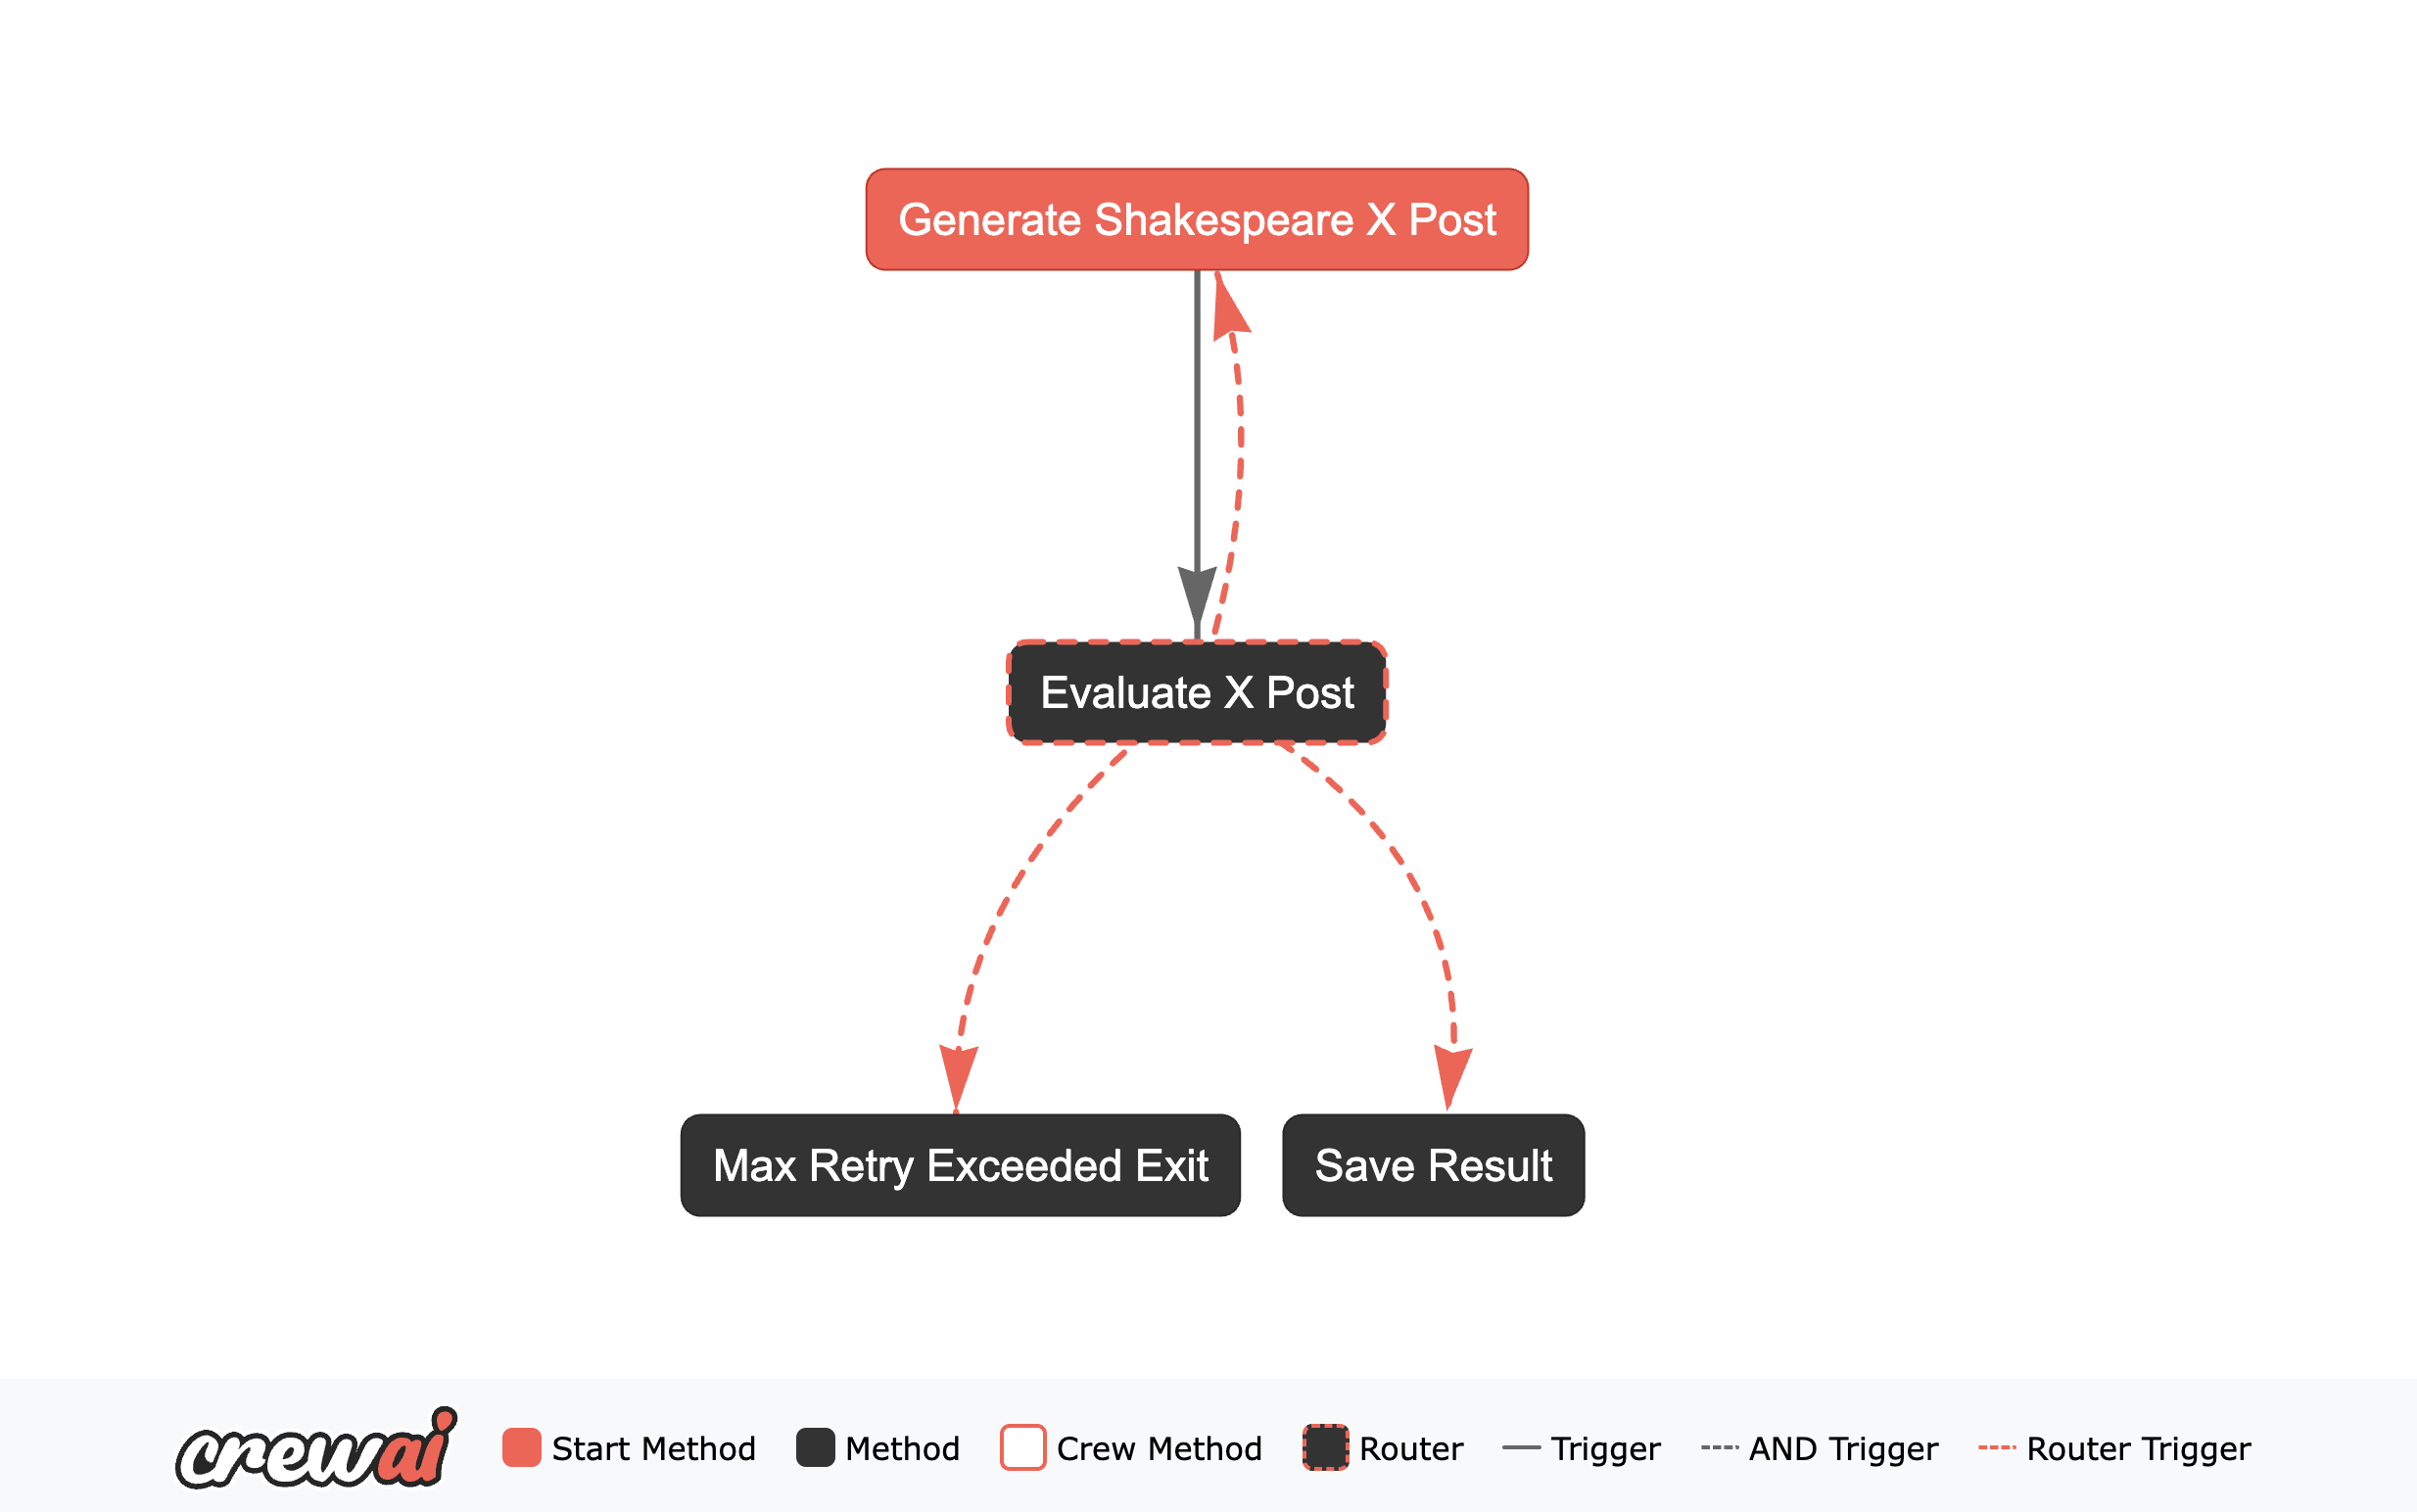
git clone https://github.com/crewAIInc/crewAI-examples.gitcd crewAI-examples/self_evaluation_loop_flow# setup your OpenAI API key in .env or export OPENAI_API_KEY=...crewai flow kickoff
We will use this example to illustrate some steps below, but you can apply the same principles to your own CrewAI agents.
Step 1: Prepare Your Agent for A2A#
Most often when running CrewAI locally, you would directly pass user inputs to kickoff() by hard coding some values required by your task or agent definition. This is a great way to test locally as CrewAI tutorials suggest, but in production you will want to accept user inputs dynamically through A2A protocol.
User inputs come from an A2A task and will be passed in under the input key when invoking the crew or flow with kickoff(). For flows, the best practice is to manage the input by storing it in the flow state and then using it to kickoff the crew or functions. Here's our example:
class ShakespeareXPostFlowState(BaseModel):# the user provided inputs from A2A task will be used to initialize this "input" field in the stateinput: str = "Flying cars"... # other state fields such as feedback, iteration count, etc.class ShakespeareXPostFlow(Flow[ShakespeareXPostFlowState]):@start("retry")def generate_shakespeare_x_post(self):print("Generating Shakespearean X post")result = (ShakespeareanXPostCrew().crew().kickoff(# use the input from the flow stateinputs={"topic": self.state.input, "feedback": self.state.feedback}))... # Other flow functions such as evaluate_posts(), routing logics, etc.
For crews, you can directly add the {input} template variable to the task definition, for example:
write_x_post:description: >Given the topic '{input}', compose a humorous hot take in the style of Shakespeare. ...expected_output: >A witty, Shakespearean hot take between 200 and 280 characters ...agent: shakespearean_bard
Then, write the A2A agent card which is a JSON file that describes your agent's capabilities, inputs, and outputs. This is exposed at the /.well-known/agent.json endpoint and used by KAgent to understand how to interact with your agent. Here's our example:
{"name": "self-evaluation-loop-flow","description": "A CrewAI flow that generates and iteratively improves Shakespearean-style posts.","version": "1.0.0","capabilities": {"streaming": true},"defaultInputModes": ["text/plain"],"defaultOutputModes": ["text"],"skills": [{"id": "generate_post","name": "Generate a post","description": "Can generate a post by providing a topic as input","tags": ["text generation", "Shakespearean"]}],"url": "http://localhost:8080"}
Step 2: Setting Up the KAgent A2A Server#
Now you can wrap your crew with KAgent's integration layer, usually in main.py created by CrewAI.
# main.pyfrom kagent.crewai import KAgentApp# you can also import the crew or flow from another file if neededclass ShakespeareXPostFlow(Flow[ShakespeareXPostFlowState]):...def main():# Either write the agent card inline or load from a JSON filewith open("agent-card.json", "r") as f:agent_card = json.load(f)# crew accepts both Crew and Flow instancesapp = KAgentApp(crew=ShakespeareXPostFlow(), agent_card=agent_card)server = app.build()port = int(os.getenv("PORT", "8080"))host = os.getenv("HOST", "0.0.0.0")logger.info(f"Starting server on {host}:{port}")uvicorn.run(server,host=host,port=port,log_level="info",)if __name__ == "__main__":main()
Step 3: Containerizing Your Agent#
Create a Dockerfile in your project root:
### 1. Choose a base image, here we use python 3.13 with uvARG DOCKER_REGISTRY=ghcr.ioARG VERSION=latestFROM ghcr.io/astral-sh/uv:python3.13-trixie-slimWORKDIR /app# Install system dependencies, git is required for installing from gitRUN apt-get update && apt-get install -y \build-essential \git \&& rm -rf /var/lib/apt/lists/*COPY ./ .# Install dependenciesRUN uv venv && uv sync --locked --no-dev# install kagent-crewai package from kagent-dev GitHub repositoryRUN uv pip install git+https://github.com/kagent-dev/kagent.git#subdirectory=python/packages/kagent-crewai# Set environment variablesENV PORT=8080ENV VIRTUAL_ENV=/app/.venvENV PATH="/app/.venv/bin:$PATH"# Expose portEXPOSE 8080# Health checkHEALTHCHECK --interval=30s --timeout=10s --start-period=5s --retries=3 \CMD curl -f http://localhost:8080/health || exit 1# Run the applicationCMD ["python", "path/to/your/main.py"]
If needed create a .dockerignore file to exclude unnecessary files from the Docker build context. Then build and push your image:
docker build -t your-registry.com/your-crew:latest . --push
Step 4: Setting Up Secrets#
Your CrewAI agent likely needs API keys. For our example, we only need OpenAI API key.
# Set your API keysexport OPENAI_API_KEY="your-openai-key"# Create secretskubectl create secret generic kagent-openai \--from-literal=OPENAI_API_KEY=$OPENAI_API_KEY \-n kagent
Here is where you can add other secrets or credentials for tools and external integrations.
Step 5: Creating the BYO Agent Resource#
Now create the KAgent BYO agent resource:
apiVersion: kagent.dev/v1alpha2kind: Agentmetadata:name: my-crew-namenamespace: kagentspec:description: Some descriptiontype: BYObyo:deployment:image: your-registry.com/your-crew:latestenv:- name: OPENAI_API_KEYvalueFrom:secretKeyRef:name: kagent-openaikey: OPENAI_API_KEY
Apply it:
kubectl apply -f agent.yaml
Step 6: Testing Your Deployed Agent#
Let's test that everything works:
# Port forward to access the agentkubectl port-forward svc/kagent-controller 8083:8083 -n kagent# Check the agent cardcurl localhost:8083/api/a2a/kagent/my-crew-name/.well-known/agent.json
You should see your agent's metadata. Now try invoking it through the KAgent CLI:
kagent invoke --agent my-crew-name --task "Research the latest developments in quantum computing"
You can also access the agent through the dashboard UI or the CLI (reference the quickstart tutorial if needed).
Note on persistance and tracing#
If your CrewAI agent needs to maintain state or memory across sessions, you can leverage KAgent's session-aware memory feature. No additional change is needed at all in your CrewAI code! This means if you have already enabled memory=True or @persist on your Crew or Flow, they will automatically use the Kagent backend! You don't need to define any storage interface or connect to any database, KAgentApp handles that!
For tracing, if you have already enabled tracing for KAgent following the tracing guide, your CrewAI agent's operations will automatically be traced as well without any additional effort.
Conclusion#
Congratulations! You've successfully transformed your CrewAI agent into a production-ready KAgent BYO agent. You can now take advantage of KAgent's robust features to manage, scale, and monitor your AI agents in a Kubernetes environment.