Quick Start#
This guide will help you get started with kagent, an open-source framework that brings the power of agentic AI to cloud-native environments. We'll walk through setting up the environment and deploying your first AI agent.
Prerequisites#
Before you begin, make sure you have the following tools installed:
- kind for creating and running a local Kubernetes cluster
- Helm - for installing the kagent chart
- kubectl - for interacting with your cluster
To run the AI agents you'll also need an OpenAI API key. You can get one here.
Installing kagent#
-
Set the OpenAI API key as an environment variable.
export OPENAI_API_KEY="your-api-key-here" -
Download the kagent CLI.
brew install kagentor
curl https://raw.githubusercontent.com/kagent-dev/kagent/refs/heads/main/scripts/get-kagent | bash -
Install kagent to the cluster by using the CLI. The following command installs a demo profile with agents and MCP tools preloaded for you. If you don't want these default agents, include the
--profile minimalflag.kagent install --profile demoExample output:
kagent installed successfully
Accessing the kagent dashboard (UI)#
-
To open the kagent dashboard, run the dashboard command from the CLI. The CLI sets up the port-forward to the UI service running inside the cluster and opens the dashboard.
kagent dashboardkagent dashboard is available at http://localhost:8082Press Enter to stop the port-forward... -
Click Let's Get Started in the welcome wizard.

Kagent welcome wizard -
Walk through the wizard screen by screen to set up your first agent. At any time, you can exit out of the wizard by clicking Skip wizard.
- Step 1: Configure AI Model: Choose an existing model such as
gpt-4.1-mini. - Step 2: Set up the AI Agent: Review the default details for a basic Kubernetes agent.
- Step 3: Select Tools: Review the preselected tools for your first agent.
- Step 4: Review Agent Configuration: Review the details of your selections, then click Create kagent/my-first-k8s-agent & Finish.

Review and finish your first wizard in the kagent wizard - Step 1: Configure AI Model: Choose an existing model such as
Good job! You created your first agent. You can share your success, or click Finish & Go to Agent.
Running Your First AI Agent#
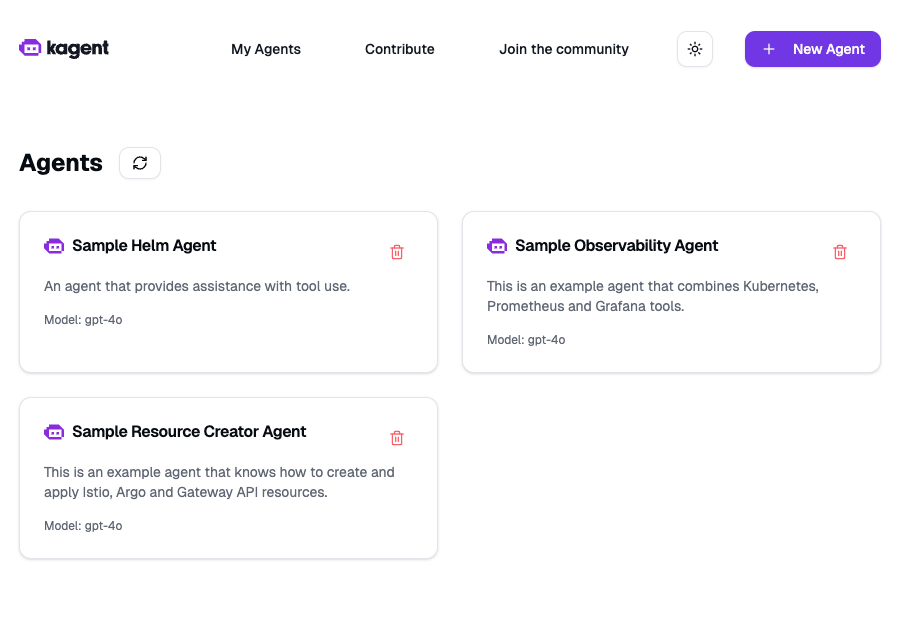
Once you're in the kagent UI, you can start interacting with the pre-configured sample agents. You can click on the agent card to view the agent details and start a conversation.
-
From the kagent UI landing page, find your
kagent/my-first-k8s-agentagent. You might have to refresh the page.
Your first agent -
Click your agent, then enter a message such as "What API resources are running in my cluster?", and click Send. The agent uses the available tools as shown in the to help answer the question.

Chat with your agent -
Click around to explore the UI some more.
- The menu shows a history of your chats as well as the ability to start a New Chat.
- The Agent Details panel shows the tools that the agent uses to respond to your messages.
- The chat interface includes Arguments and Results that you can expand to see more details about how your question was answered. For example, the Results show the output of the
kubectlterminal commands that the agent ran to list the API resources in your cluster.

Explore features of the chat UI, such as results that show the output of terminal commands
Using the CLI#
Interact with kagent in your terminal.
-
Review the available commands.
kagent helpAvailable Commands:bug-report Generate a bug reportcompletion Generate the autocompletion script for the specified shelldashboard Open the kagent dashboardget Get a kagent resourcehelp Help about any commandinstall Install kagentinvoke Invoke a kagent agentuninstall Uninstall kagentversion Print the kagent version -
List the current agents.
kagent get agent+---+---------------------+----+----------------------------+| # | NAME | ID | CREATED |+---+---------------------+----+----------------------------+| 0 | helm-agent | 2 | 2025-03-13T19:08:14.527935 || 1 | observability-agent | 3 | 2025-03-13T19:08:14.348957 || 2 | istio-agent | 1 | 2025-03-13T19:08:13.794848 |+---+---------------------+----+----------------------------+ -
Interact with an agent with the
invokecommand. The agent is called and a conversation starts.kagent invoke -t "What Helm charts are in my cluster?" --agent helm-agentIn the output, verify that the agent found the
kagentHelm chart release. If any other Helm charts are in your cluster, it finds those, too. Keep chatting with the agent to see what other things it can do :)
Next Steps#
- Create your first agent
- Learn about Core Concepts
- Join our Community
Need Help?#
- Visit our GitHub repository
- Ask a question on Discord
- Check out the FAQ